
Making the mannequin
Many people have asked me if I would include details of how the mannequin is made and, as this is always the first step in the construction of any armour I make, I thought it appropriate to include it here. In that the armour is made to fit the mannequin, it is essential to spend time ensuring that the proportions and stance are right. My son acted as model many years ago and it is from these measurements that all the mannequins are made.
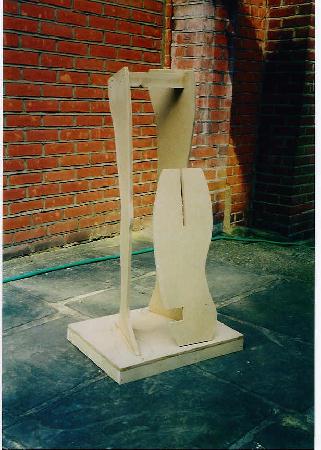
A simple box is made for the base and the outline of the position of the feet drawn. Fig. 1 shows the base pedestal with slots cut for the leg sections - all the pieces being cut out of 12mm. MDF ( cutting this material should be carried out in well ventilated areas. If using power tools these should have a dust extraction facility and one should wear a suitable respiratory protection mask ).
The sections are assembled with short lengths of 2 x 2" timber holding the frame together at the hip - using screws and adhesive. Figs. 2 & 3 show the assembly stage -

- and Fig. 4 shows the completed mannequin.

I have included a page with line drawings of the mannequin pattern that can be enlarged to make them 1:1 scale.