The poleyn
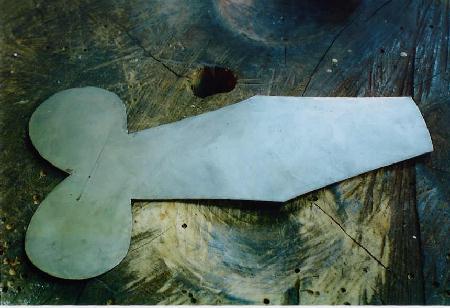
During the 16th.C the number of lames forming the shell articulation at the knee was reduced to two - one above and one below the poleyn. I always start this section with the poleyn as, if any adjustments are necessary, it is much easier to adapt the lames to the poleyn rather than the other way round. First the shape is cut out of the sheet steel ( Fig. 35 ).
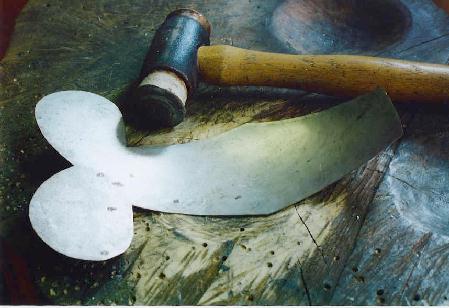
This is next dished into the shallowest of the three depressions on the stump with the rawhide hammer ( Fig. 36 ).
The doming is increased by hammering into the deeper depression - again with the rawhide hammer - and finally into the deepest dish using the heavy ball-ended hammer. The latter is carried out with hammer blows following concentric rings inwards towards the centre, taking care not to crumple the outer edges. The heaviest blows are delivered to the metal in the centre as it is here one wants to stretch the metal and push it into the dish. The hammer work on the outside is only light just to keep the outer edge smooth. Fig. 37 shows the dishing stage complete ready for planishing.
As before this is carried out by hammering over the steel ball using the flat face of the heavy hammer. The piece is placed over the steel ball and, working from the centre in circular passes, overlapping blows are used to create a lightly faceted effect. It is important to always move the piece being worked on rather than varying the direction of hammer blows - the hammer always striking the same spot on the ball with the piece being worked moving between the two. Several passes may be necessary to produce a smooth even doming of the piece. If the piece has been sufficiently deeply dished then planishing merely forms a smooth surface ready for finishing. The best result is achieved by fairly light hammering, keeping the face of the hammer mirror-smooth, as the finish on the hammer is the finish that will be imparted to the work ( Fig. 38 ). ( The formation of the poleyn is dealt with in somewhat more detail in the section on the leg defense in Project 1 )

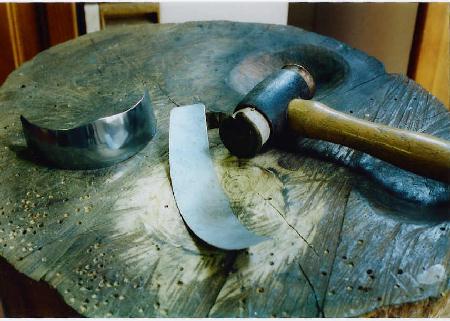
Next the lames are cut out and a few swift passes with the rawhide hammer into the shallow depression produces the necesary shape ( Fig. 39 ).
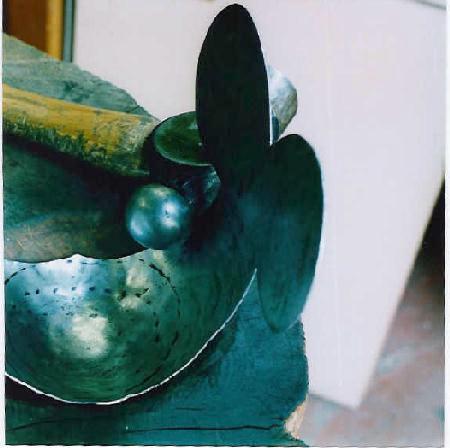
Finally the pieces are assembled and articulated with the domed end of the cuisse, taking great care to align all the pieces exactly ( it can be seen in Fig. 40 that a vertical line has been drawn down the centre of each piece to ensure correct alignement.
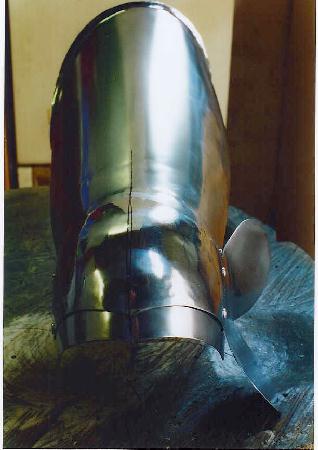
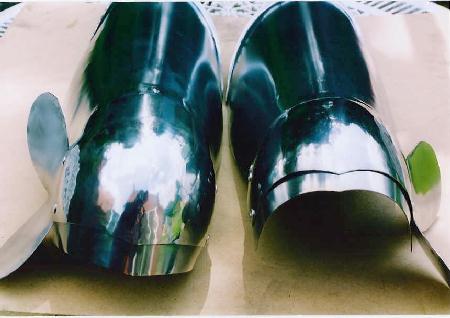
The next image on this page, Fig. 41, shows both cuisses articulated with their poleyns - the left knee extended and the right flexed
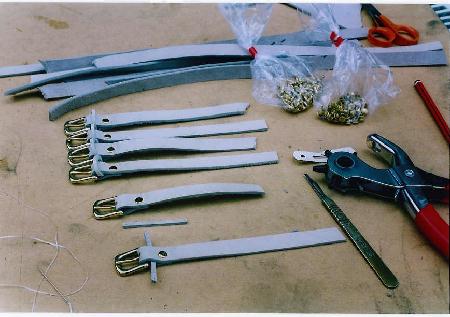
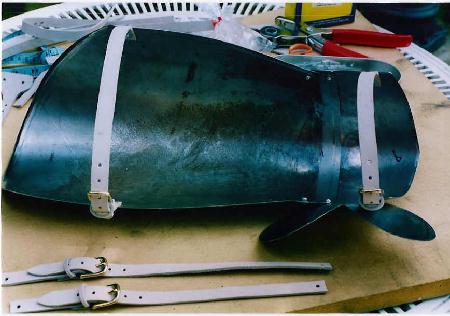
Before moving on to the next stage the strapwork for the leg harness is made up and fitted. In Fig. 42 the straps have been cut and are in process of being assembled on the buckles -
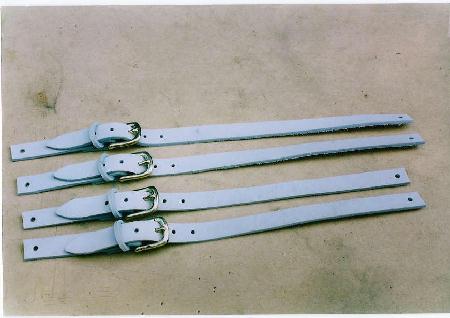
- and in the next image, Fig. 43, the straps are completed ready for riveting in place.
The final image on this page, Fig. 44, shows the inner aspect of the upper leg harness with the strapwork in place.
On to the next stage - the defense for the lower leg or greave.