Making the cuirass
15th. May 2005
The cuirass for this armour is similar to that in 'Project 1 - The Gothic Armour'. The front is constructed in two sections - the upper piece being overlapped by the scalloped edge of the lower demi-placcate. However, the back of the cuirass instead of being just one section, is formed by four overlapping plates - which has allowed me to give it a much more rounded, globose shape. As I mentioned on the start page for this project, sliding or almayne rivets would have been used to secure the various plates forming the cuirass, giving a degree of flexibility to the armour. As this armour is only intended for display, I have not ahered to this rule. I have tried to show the construction of this cuirass in much more detail than was the case in 'Project 1'.
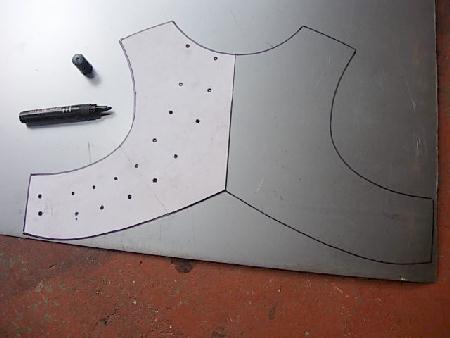
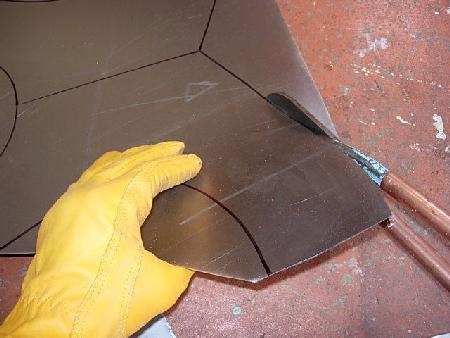
The first stage is to mark out the outline of the pattern on the metal and Fig. 1 shows the outline of the upper section of the front of the cuirass. This is then cut out using shears, Fig. 2 -
- and Fig. 3 shows the piece after initial shaping and the lines for the fluting being drawn on the inner aspect.
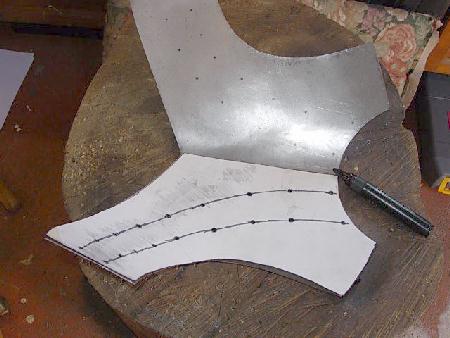
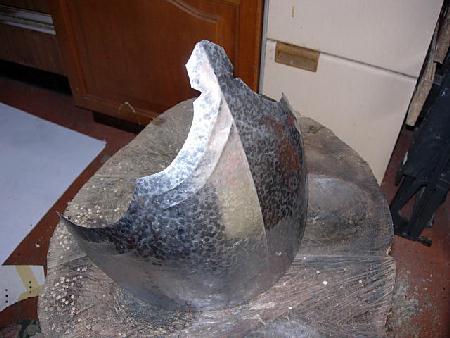
The next image, Fig. 4, shows the completed upper section prior to polishing.

In the previous two constructions I have tended to polish each section as it is made prior to initial assembly. Here it is my intention to assemble the component under construction before final finishing. As I have mentioned before, I much prefer to use blind 'pop' rivets for the initial assembly. I find these much quicker to use than nuts and bolts and, being made of aluminium, it is a very simple procedure to drill them out prior to replacing them with round-headed steel rivets.
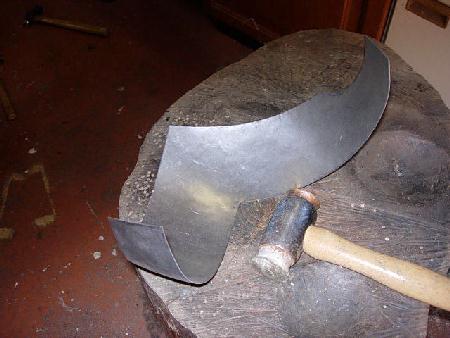
Fig. 5 shows the initial hammer-work on the lower section of the front of the cuirass, the demi-placcate.
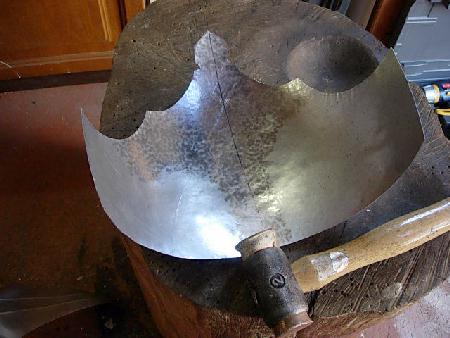
The piece is dished into the shallowest of the three depressions on the stump using a heavy rawhide hammer. It is a misconception that I have come across occasionally that one needs a large dishing area to effectively impart a domed shape to a large section such as a cuirass. Each of the depressions in the stump measures only about 12cms. across and this is quite adequate to work any size piece.
In Fig. 5 the initial dishing has been carried out followed by some planishing to the upper section. With a large piece I find it necessary to refine the curvature by further use of the rawhide hammer after planishing. Fig. 6 shows the finished lower section of the cuirass with some fluting having been imparted to the upper scalloped edge.
Initial assembly of the two front sections is now carried out, Fig. 7 -
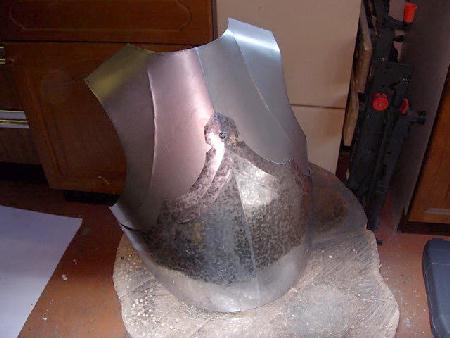
- and in the next image, Fig. 8, strengthening pieces with turned out edges have been added along the apertures for the arms.
As I mentioned earlier, the back of the cuirass is to be formed of a number of overlapping lames. This allows a much more globose shape to be given to the piece. Fig. 9 shows one of the lames after dishing.
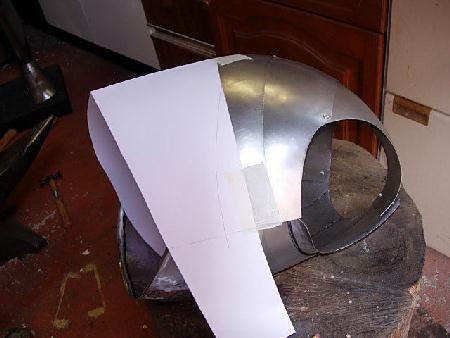
Although I have a pretty clear idea of how I want this final armour to look, the construction process is very much a case of 'make it up as you go along', in that I am not starting with a set of pre-drawn patterns. This I find is what makes it so interesting - starting out with just an idea and then working out how to turn that into the finished piece, never knowing quite how it's going to turn out at the end of the day. Fig. 10 shows me trying to figure out the shape of the pattern for the bottom section of the back of the cuirass -
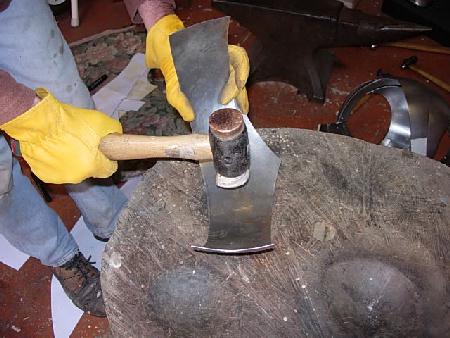
- and in Fig. 11 the piece has been cut out and is being dished with the rawhide hammer.
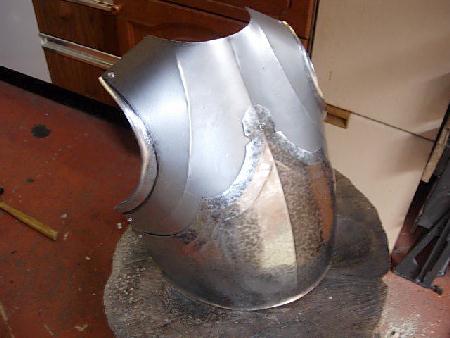
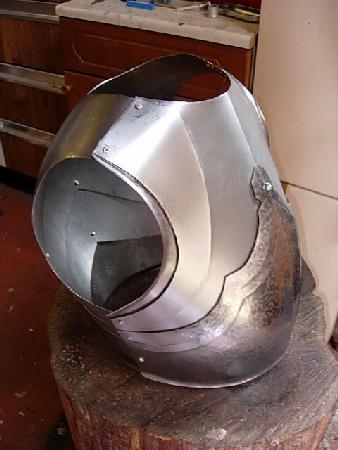
With each piece having been shaped and drilled the cuirass is gradually taking shape and Fig. 12 shows initial assembly prior to finishing.
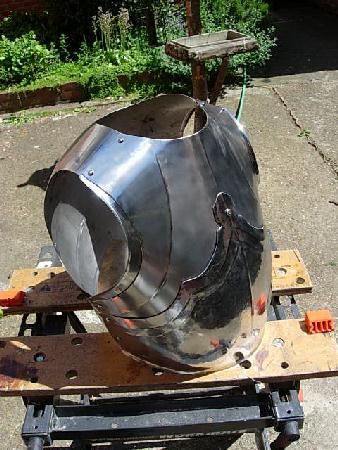
The blind rivets are now quickly drilled out and any necessary minor adjustments to the shaping to ensure close adaptation of the component parts carried out. Each piece is now polished and the cuirass finally assembled using round-headed steel rivets - Figs. 13 & 14.
On the next page I shall be making the rear skirt.