
The greave or grevière
1st. August 2005
For this armour, as in the previous project, the frontal aspect only of the greave is to be made. This piece can be deceptively difficult to make. It is very important to recognise that the lower leg is not simply a cylinder tapering slightly towards the ankle. Rather it must follow the line of the musculature to achieve the correct look and this can be best seen by looking at the relevant anatomy. I make no apology for once again showing the line drawing of the musculature of the left lower limb as seen from the front, as it helps to show the characteristic outline produced mainly by the gastrocnemius muscle (A), which forms the higher inner curve, and the smoother more gentle outer curve produced by peroneus longus (B), together with the bulge on the inner aspect of the ankle produced by the medial malleolus of the tibia (C).
Fig. 46 shows the steel that will form the right greave before any shaping is carried out. The centre line together with the areas to be dished have been marked on the inner aspect and in Fig. 47 the hammer-work on these areas has started.


The next two images ( Figs. 48 & 49 ) show the right greave after rolling into shape with the central crease applied.


Ideally this time I would have liked to have made the greave in one piece with the lower section sweeping over the ankle and top of the sabaton. Unfortunately the metal wasn't doing what I intended it to do and so I have reluctantly once again made the lower section as a separate piece. Fig. 50 shows the piece cut from the steel sheet prior to curving into shape -

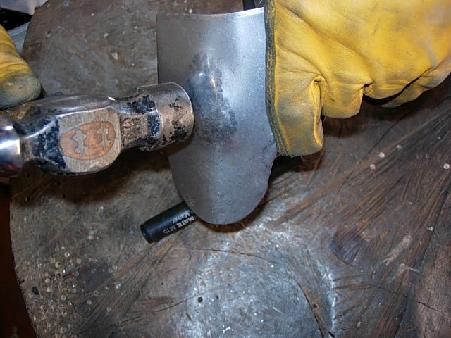
- and in Figs. 51 & 52 the bulge to accomodate the end of the tibia is being applied, with the hammer-work from the inside being carried out into the lead block, followed by light planishing. ( Here the section that will form the end of the left greave is depicted ).

Finally the piece is flared where it will overlap the top of the sabaton ( Fig. 53 ).

The two sections that will together form the left greave are shown after polishing in the next two images ( Figs. 54 & 55 ) -


- and in the final image on this page, Fig. 56, the completed greaves are shown with the lower sections riveted in place.

On the next page I will be making the sabatons or sollerets as the were known at the time.