
The plate armour for the shoulder or pauldron
The plate armour providing defense for the shoulder and upper arm needs to be light in weight and so designed to give a great degree of flexibility. The top section or cop is anchored to the shoulder section of the cuirass with a single leather strap and the lower section, which is made up of a number of overlapping lames forming the spalder, has another strap attached to it's lower end which passes around the upper arm.
Here the cop is made of three overlapping plates which are domed so that when articulated they form a curve delineating the rounded shoulder. Fig. 43 shows the largest of the three plates being domed into the dish-shaped depression in the stump with a rawhide hammer.
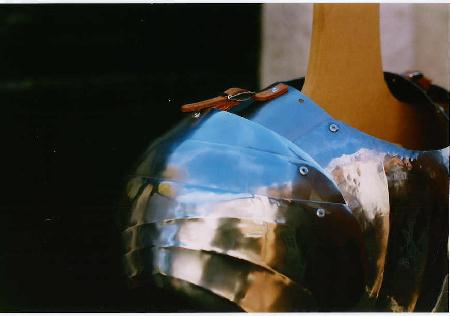
After the metal is domed it is embellished with lines creased from the inside, which not only enhances the appearance, but adds strength to the piece. The three sections are now riveted together in the shell articulation manner and Fig. 44 shows the finished top section attached to the cuirass with a short leather strap.
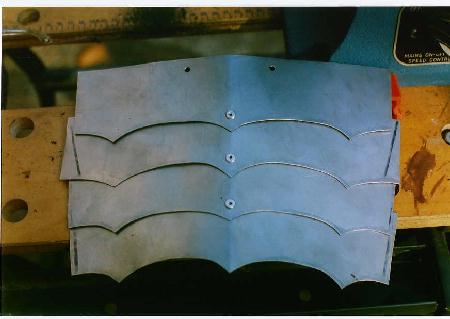
Next the four lames that will form the spalder covering the upper arm are cut out and marked ready for articulation. In the next image, Fig. 45, the lames have been riveted together in the centre as a temporary measure to facilitate accurate positioning of the lateral creases which will run in such a way as to coincide with the downward points. Notice that at this stage the sides of the lames are not even, as it is easier to trim them to size once assembled and thus achieve an even line.
After the lines for the creases have been marked out with a permanent marker pen and the sides have been trimmed, the central rivets are quickly removed by drilling out and the creases formed. Although I form all the curved creases by hammering along a line on the inside of the piece using the curved lawn edge-trimmer tool, straight-line creases are easier to form using a bolster chisel with a slightly sharpened edge.
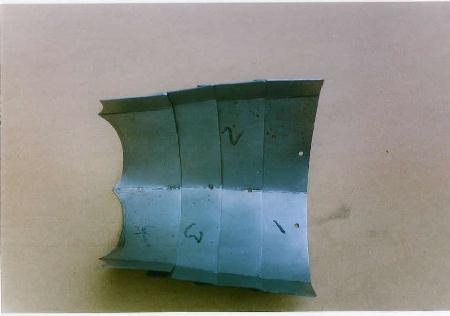
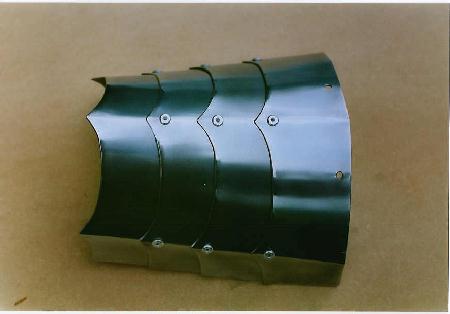
Each lame is now shaped so that it fits snugly within the next without any gaps or tension, forming a slightly reducing taper which provides a transition from the shoulder to the smaller upper arm. Fig. 46 shows the four lames resting one inside another ready for finishing. It is a good idea to number each one with the permanent marker at this stage to avoid getting confused when finally assembling the spalder.
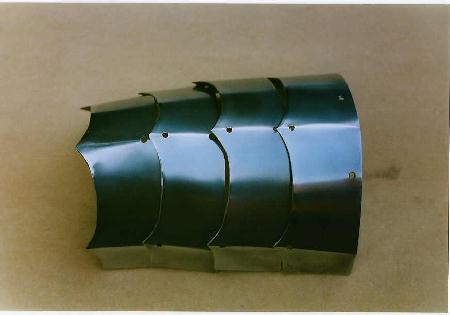
The pieces are now polished and Figs. 47 & 48 show them in place ready for riveting together - and then finally assembled.
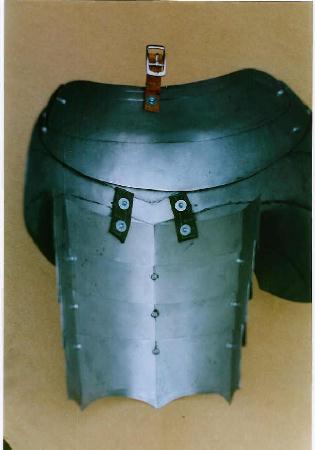
The lower lames of the spalder are joined to the upper section of the pauldron with two short leather straps riveted in place. Fig. 49 shows a view of the inside of the finished plate armour for the right shoulder and upper arm.
On the next page I will be making the plate armour or harness that will cover the lower arm - the vambrace.