
Preparing the mannequin
Here in Fig. 89 the mannequin has been cleaned and painted and the armour could be displayed on it as it is. However, the woodwork between the top of the cuisses being visible tends to spoil the final appearance ( see Fig. 42 ).
The overall effect of the finished armour is much improved if a pair of breeches are made for the mannequin. The pattern is made by taking a pair of trousers and drawing around one leg and up the centre. The fabric to be used is first folded face-to-face and then folded over again. Placing the pattern over the material and cutting around it now produces four pieces - two for the front and two that will form the back. The inside leg and front and back seams are now machine sewn, leaving the outside seams open. Then a hem is sewn at the waist and knee-ends so that a draw-string can be threaded through ( Fig. 90 ).

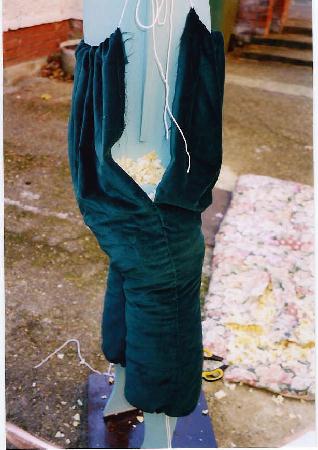
The breeches are now hung on the mannequin and the draw-strings below the knees tightened ( Figs. 91 and 92 ).


The outside seams are now sewn by hand, starting at the cuff below the knees, and the breeches stuffed as work progresses up to the waist ( Figs. 93 and 94 ).

Now the mannequin is ready it only remains to assemble the finished armour. The next page shows the final assembly with the replacement of the aluminium rivets with conventional steel.
Back to the start of this project.
( I am indebted to my wife, V, both for her skills as a seamstress and the narrative and images on this page ).